Showing posts with label co-op. Show all posts

Thursday, September 26, 2013

Blowguns

We have divided our science class into to topic areas:  Hands on Science and Mini Weapons!

We are using a series of books written by John Austin as a basic guide:  Mini Weapons on Mass Destruction...yes only with a group of homeschoolers would such a book seem like a good idea!

We made blowguns out a pvc pipe and a reducer (to keep the younger kids from sucking the projectile back into their mouths and to produce a tighter seal around the gun).  The design is simple, cut a piece of pvc pipe about 12 inches long, attach a reducer (we needed the aid of a hammer to attach this), insert your projectile (we used marshmallows, nerf darts and paintballs) and blow!  This is a fairly cheap project as you can get a long piece of pvc pipe for under $3 (I think it was either 8 or 10 feet) and reducers cost about $.30 each.  We did find that rolling a piece of paper or two and putting it into the barrel to reduce the diameter helped some of the projectiles fire more efficiently. 


We also constructed 2 additional blowguns.  One using a piece of paper that shot darts made out of a toothpick and a 3"x3" post it note and another made out of 2 pens (with ink cartridges removed) that shot a dart made out of a toothpick and q-tip.  The directions for both of these blowguns were found in the Mini Weapons of Mass Destruction books.


Vincent Van Gogh

I am so excited to have the opportunity to study art with another group of young people.  I have learned so much since the first time I decided to attempt this class and am excited to revisit some favorite projects and explore some new ones!

We have started our study off with the artist Vincent Van Gogh

Here are a couple of websites I used to inspire projects:
http://www.artprojectsforkids.org/search/label/artist%20Van%20Gogh
http://teachkidsartappreciation.com/category/vincent-van-gogh/

We also found these three books particularly enjoyable:
Vincent Van Gogh Sunflowers and Swirly Stars by Brad Bucks and Joan Holub
And these two titles from the Metropolitan Museum of Art:
Vincent's Colors Words and Pictures by Vincent Van Gogh
What Makes a Van Gogh and Van Gogh?

Interesting facts we learned about Vincent Van Gogh:
1) He wasn't rich, in fact his brother had to support him and buy him art supplies.
2) He cut off part of his ear and sent it to a woman he was in love with as a gift.
3) He only sold one painting in his lifetime.  It was called "The Red Vineyards"
4) He was only an artist for 10 years.
5) He didn't start painting until he was 27.
6) He created over 1,700 drawings in painting during his short career.
7) He thought that the name "Van Gogh" was hard to read so he signed his pictures with just his first name!
8) His most expensive painting (of record) sold for $82.5 million in 1990.  It is the "Portrait of Dr. Gachet".  Not a personal favorite of mine!

We started off the first week with our rendition of "14 Sunflowers in a Vase":


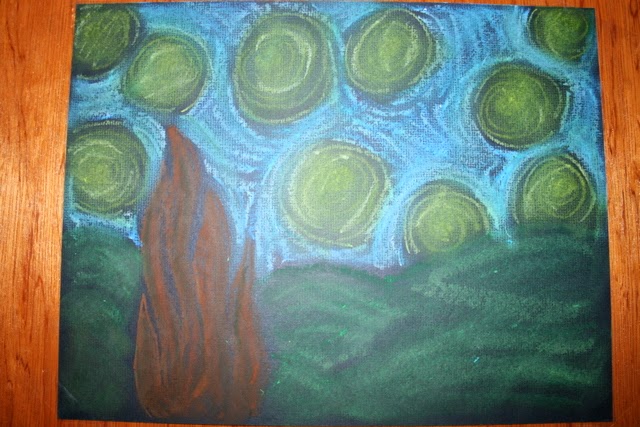
The second week we tackled "Starry Night":  Each student got to choose what size (and color) of background paper that wanted to use!

 by Sophia
 by Laura
 I love that William boldly signed his name just like Vincent did!  Guess he thinks William is too hard and has shortened it to Will for the sake of his art!
by Luke

And the third week we explored the concept of line by doing this project that I found at the Art Projects for Kids website:


and then we decided to combine 3 of Van Gogh's works into our own masterpieces-- "14 sunflowers in a vase", Starry Night" and "The Red Vineyards".  I love how these turned out!


Thursday, September 19, 2013

Egg Drop

One of our favorite hands on science experiences through the years has been an egg drop.  You collect packing materials, construct a container for your egg and then drop it from a given height to see if your egg will survive!  This time we were lucky to have a location that offered 3 different heights for increasingly more dramatic drops.  In order to proceed to the next drop, your egg needed to survive the previous drop.....

Here is a website with some great information: http://montshire.org/programs/special-events/egg-drop/

First we started off by making our containers!  We had lots of materials to choose from like plastic containers, bubble wrap, tape, toilet paper rolls, material, balloons, garbage bags, egg cartons and lots more:


Once everyone was finished with their containers we headed outside and took a group photo:
 
Then we proceeded to drop the eggs from the first landing on the fire escape.  I am guessing it was about 18 fee.  Even I got involved and dropped my container:


Some of our eggs survived:
And some of them didn't:

Anyone whose egg survived went on to the second landing, around 28 to 30 feet:
 
Anyone whose egg survived that drop went on to the top of the landing (roof level) which was probably about 40 feet.  I REALLY hate heights so Luke took my container up for me and tossed it off!


William's egg survived the final drop:
 
We had quite a group of kids whose eggs survived all 3 drops:

The funniest thing was after the last drop a few of the boys whose eggs had survived asked if they could just drop their eggs to the ground with no container and I told them that was fine, as long as they picked up the shell!  William went and CHUCKED his egg and it BOUNCED 4 times and DID NOT BREAK!  We couldn't believe it!  He then threw it straight down onto the group (to prove to everyone that it wasn't some kind of trick egg) and it splattered everywhere!

Thursday, September 12, 2013

Pizza Box Solar Cookers

For some reason each and every time I try to make solar cookers with a group of kids, the weather doesn't seem to cooperate!  This attempt was no different!  Fortunately I made a cooker the day before and it was sunny and it got HOT and cooked our treat up perfectly!

Cooker we made: http://www.nmsea.org/Curriculum/4_6/pizza_box_oven/pizza_box_ovens.htm and also at this website: http://kitchenpantryscientist.com/?p=313  We did find that adding the newspaper for insulation worked much better than our previous attempts at solar cooking!

Recipe we cooked:
1 flour tortilla
creamy peanut butter (although crunchy would probably work as well)
handful of chocolate chips (we used semi sweet ones)
handful of mini marshmallows

Spread the tortilla with peanut butter then sprinkle the peanut butter with chocolate chips and marshmallows, roll up (remember to bend in the ends so the insides don't come oozing out!).  Place in your solar cooker and heat for about 30 minutes!


Edited to add pictures of the solar cooker in action that were on the other camera!